Since three of the four people in my office didn’t realize that FaceTime isn’t enabled by default, we thought it would be nice to share the simple, but easily over-looked aspect of how to actually turn it on for anyone with an iPhone 4. And yes, I am jealous, but I’m on Verizon and that’s not changing anytime soon (though I think my Android phone is heading to the trashbin fairly soon – more on that another time). Also, I think this post will do really well for my blog’s SEO purposes, which is great because of all the ads I show. Oh, wait… Anyhow, here you go:
When you first get your iPhone and make a call, it’ll look like the old iPhone call screen:

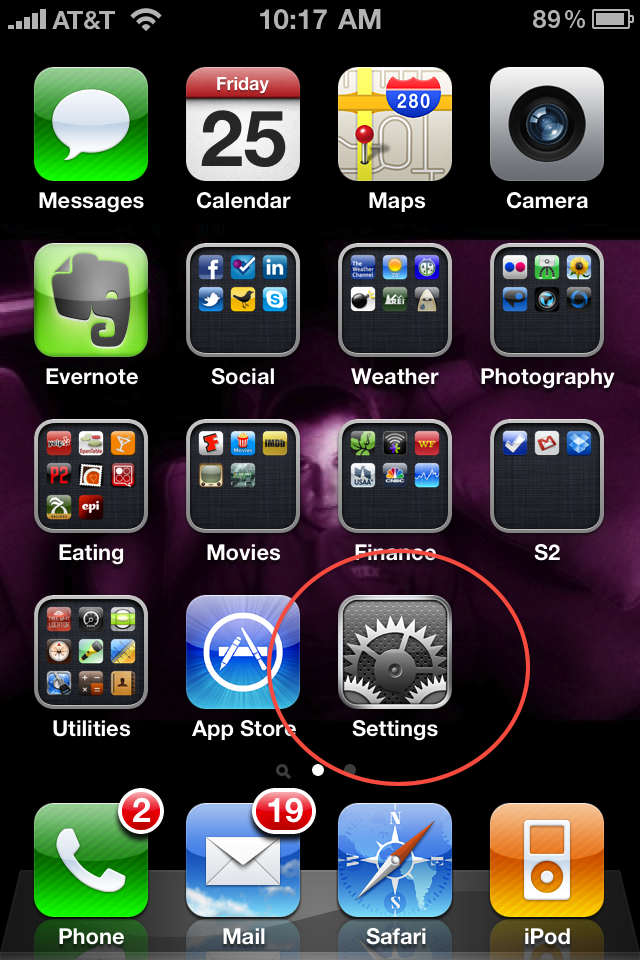
Don’t fret, you are merely 4 clicks away from Facetime! First, go to home, then settings:
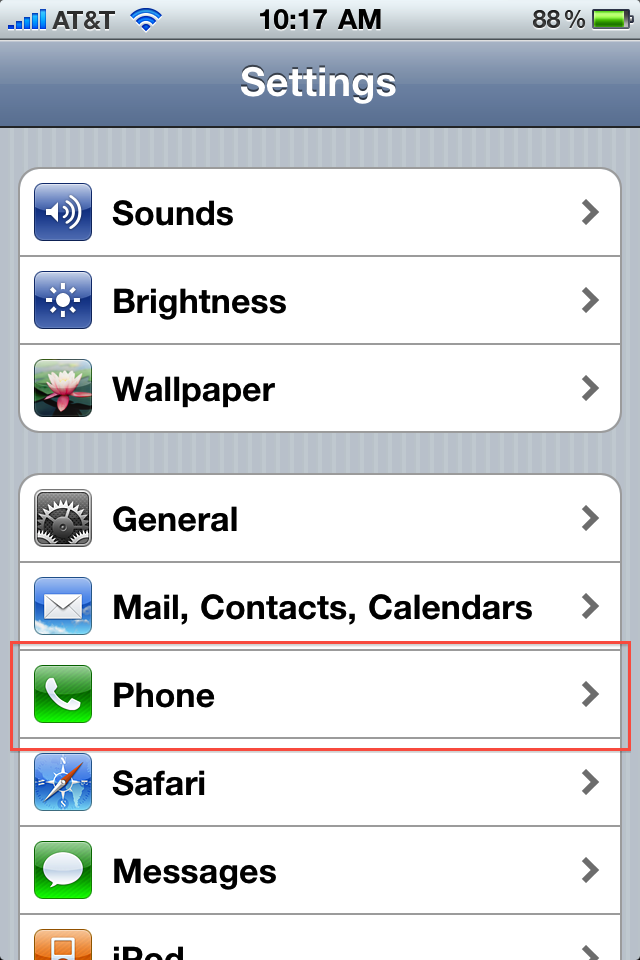
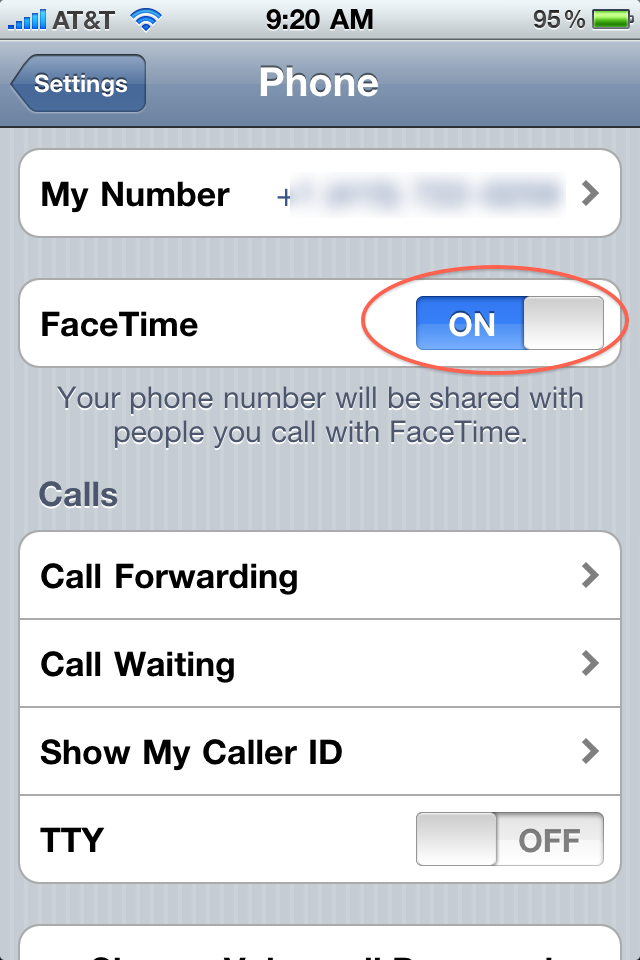
Then click on “Phone” settings. Now you’ll see a big happy shiny button to enable FaceTime. Do so.
Now the next time you make a call, you’ll see the FaceTime button dead-center in the middle. And all will be well in your world!
We had a little debate about if this should’ve been enabled by default or not. I think we all agreed it seemed a bit odd to start disabled, but I’m sure there was some reason behind it, possibly due to privacy, bandwidth concerns, etc. Once FaceTime is enabled, you’ll also notice a slight change in your call history:
I wonder if a future version of iOS will enable FaceTime voicemails or recording?
Anyhow, hope this was helpful to those who didn’t want to have to use the official Apple FaceTime tryout number! 🙂



 I’m willing to place a small wager that I represent less than 1% of iPad pre-order customers when I say: “I have never owned an iPod/iPhone, nor used iTunes to sync a media file/collection.” Yup, I’ve never dealt with the library, App Store, syncing, or anything else before. Sure, I’ve used my friends’ iPods to browse and play music, but that’s about it. In candor, my


